目录
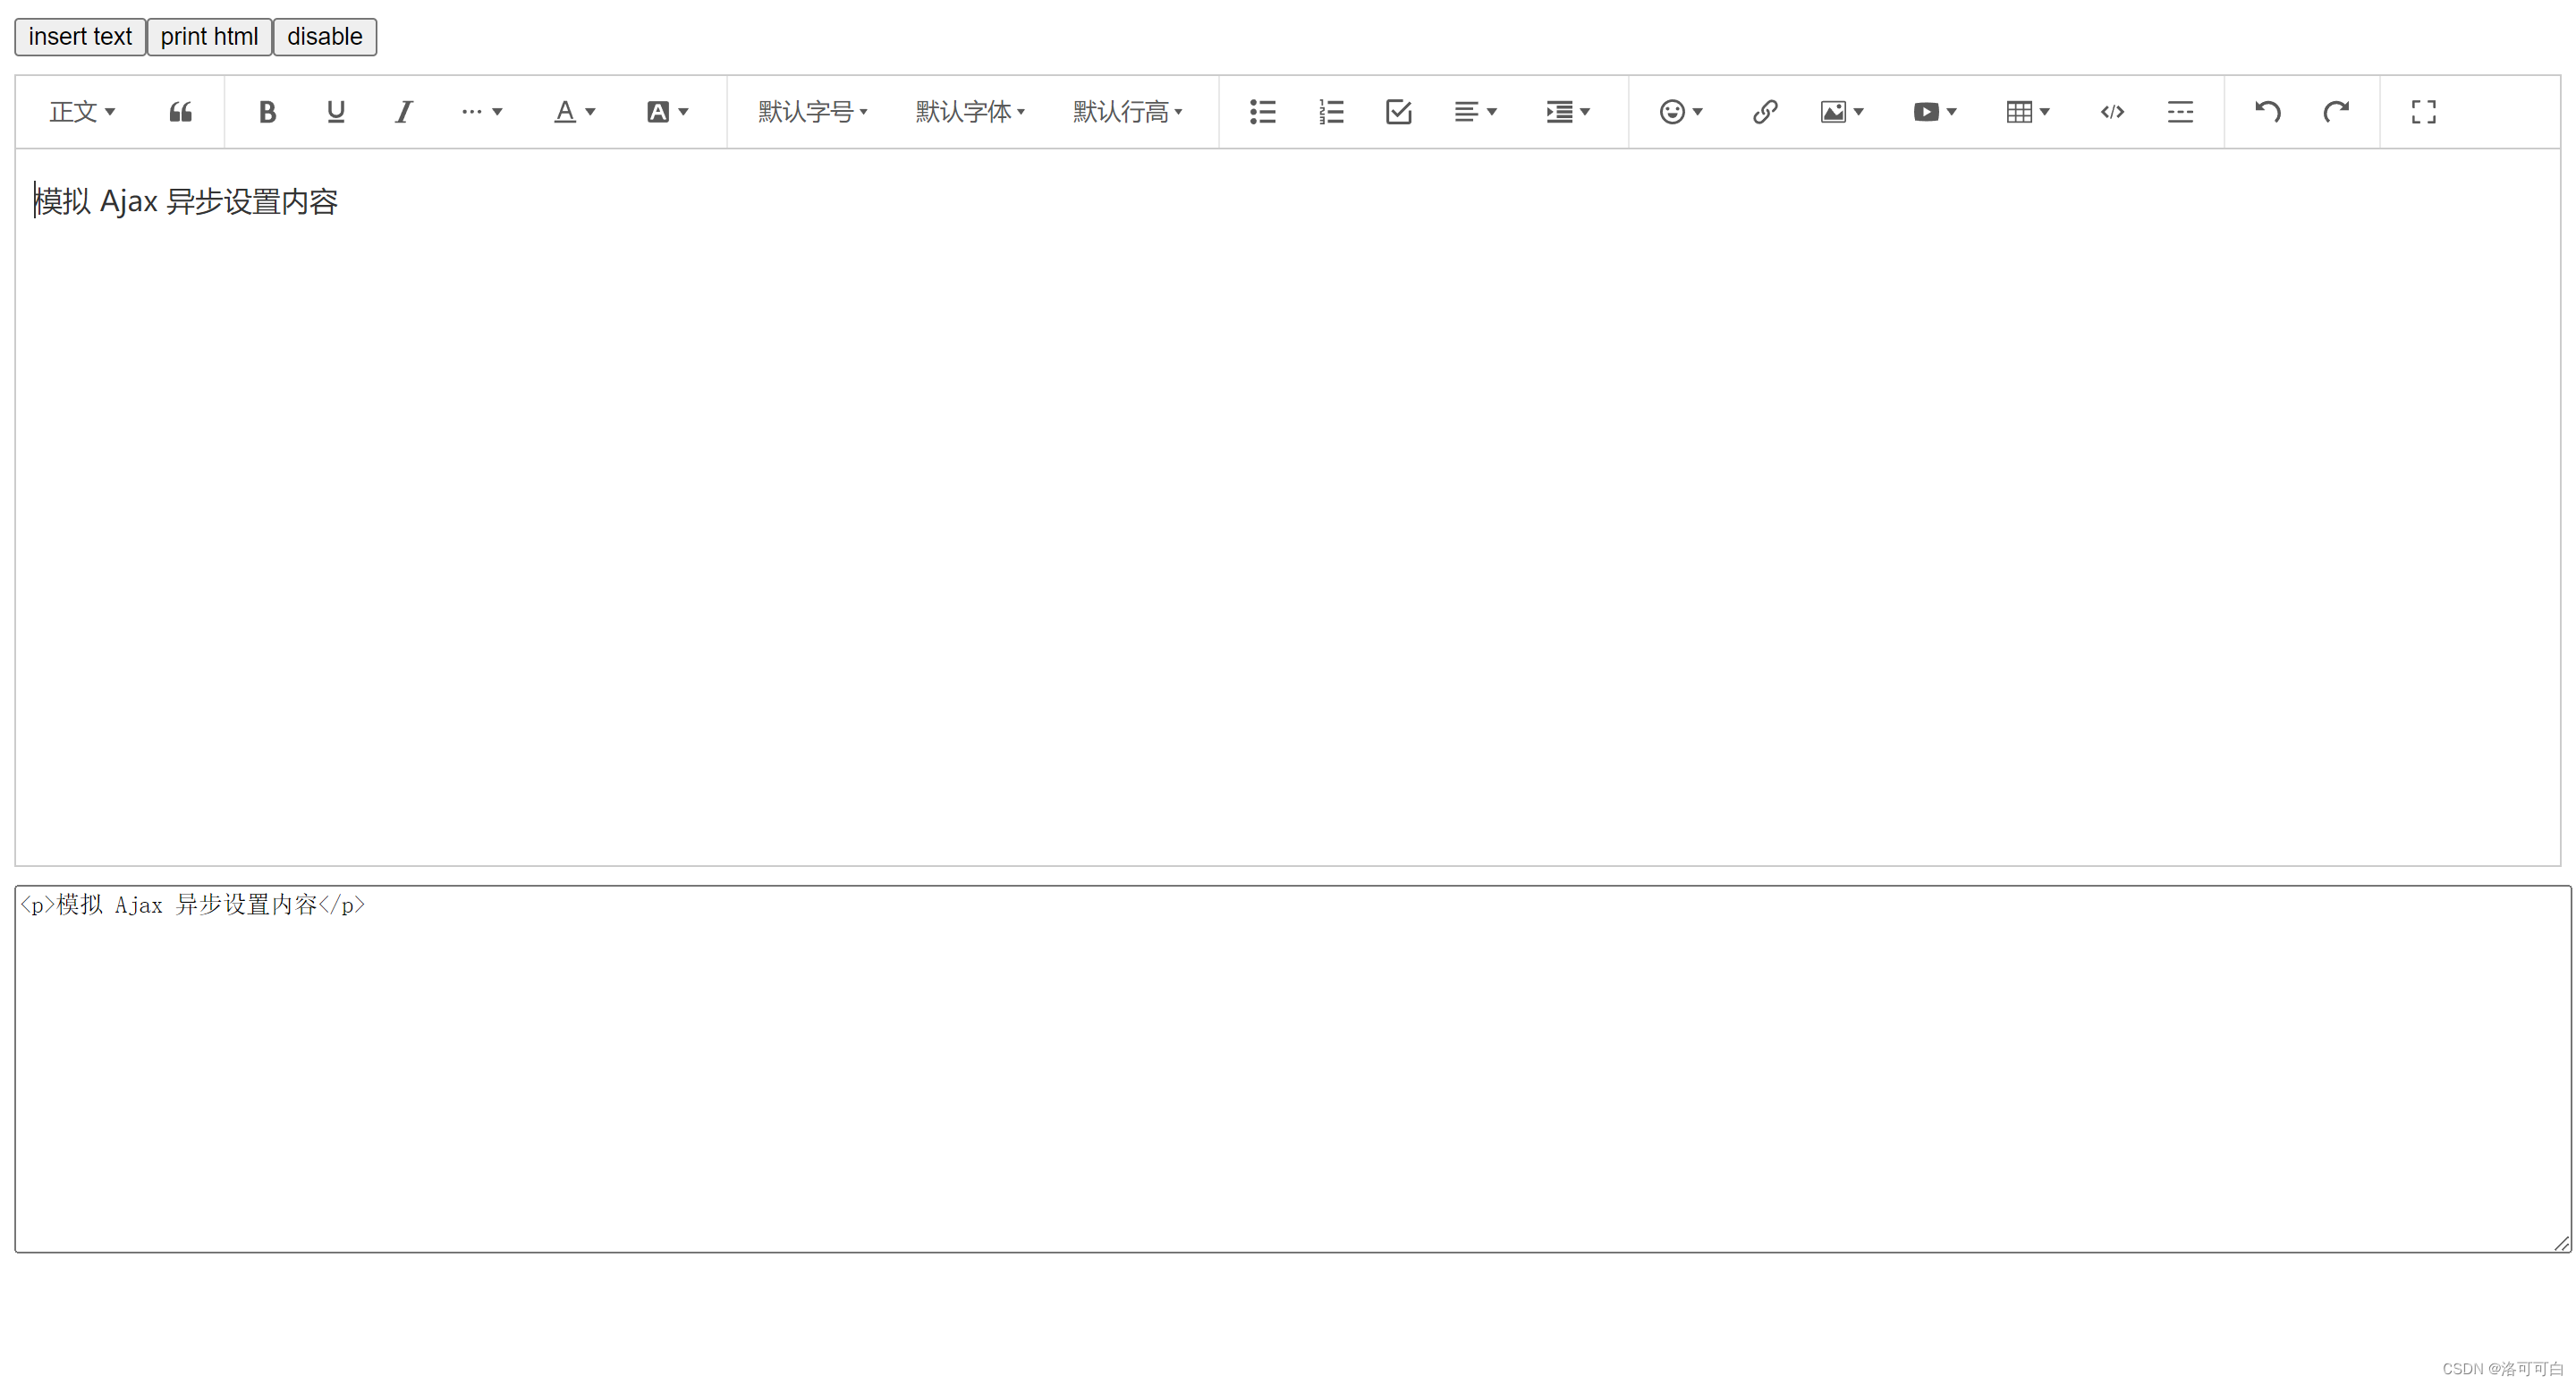
结果图[code]wangeditor 官网指南[/code]
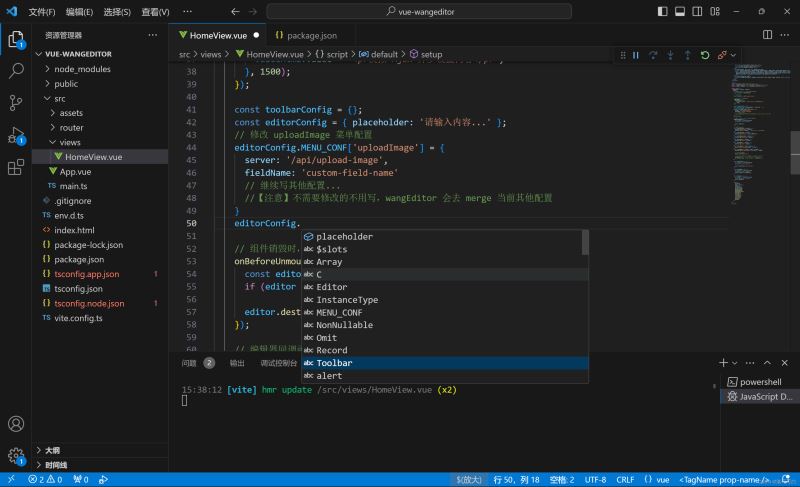
在Vue项目中利用[code]wangeditor[/code]构建富文本编辑器,您需要依照以下步骤来集成和利用这个盛行的编辑器: 步骤 1: 安装 wangeditor起首,您需要在Vue项目中安装[code]wangeditor[/code]。可以通过npm来完成安装: [code]yarn add @wangeditor/editor # 或者 npm install @wangeditor/editor --save yarn add @wangeditor/editor-for-vue@next # 或者 npm install @wangeditor/editor-for-vue@next --save [/code]步骤 2: 引入 wangeditor 到您的组件在您盼望利用富文本编辑器的Vue组件中,引入[code]wangeditor[/code]: [code]import '@wangeditor/editor/dist/css/style.css';// 引入编辑器的CSS样式 import { onBeforeUnmount, ref, shallowRef, onMounted } from 'vue'; import { Editor, Toolbar } from '@wangeditor/editor-for-vue'; [/code]步骤 3: 创建编辑器实例和响应式数据在Vue组件的[code]mounted[/code]生命周期钩子中,创建[code]wangeditor[/code]的实例,并将其绑定到指定的DOM元素上: [code]export default { components: { Editor, Toolbar }, setup() { // 编辑器实例,必须用 shallowRef,紧张! const editorRef = shallowRef(); // 内容 HTML const valueHtml = ref('<p>hello</p>'); // 模仿 ajax 异步获取内容 onMounted(() => { setTimeout(() => { valueHtml.value = '<p>模仿 Ajax 异步设置内容</p>'; }, 1500); }); const toolbarConfig = {}; const editorConfig = { placeholder: '请输入内容...' }; // 组件销毁时,也及时销毁编辑器,紧张! onBeforeUnmount(() => { const editor = editorRef.value; if (editor == null) return; editor.destroy(); }); // 编辑器回调函数 const handleCreated = (editor) => { console.log('created', editor); editorRef.value = editor; // 记载 editor 实例,紧张! }; const handleChange = (editor) => { console.log('change:', editor.getHtml()); }; const handleDestroyed = (editor) => { console.log('destroyed', editor); }; const handleFocus = (editor) => { console.log('focus', editor); }; const handleBlur = (editor) => { console.log('blur', editor); }; const customAlert = (info, type) => { alert(`【自界说提示】${type} - ${info}`); }; const customPaste = (editor, event, callback) => { console.log('ClipboardEvent 粘贴变乱对象', event); // 自界说插入内容 editor.insertText('xxx'); // 返回值(留意,vue 变乱的返回值,不能用 return) callback(false); // 返回 false ,阻止默认粘贴举动 // callback(true) // 返回 true ,继续默认的粘贴举动 }; const insertText = () => { const editor = editorRef.value; if (editor == null) return; editor.insertText('hello world'); }; const printHtml = () => { const editor = editorRef.value; if (editor == null) return; console.log(editor.getHtml()); }; const disable = () => { const editor = editorRef.value; if (editor == null) return; editor.disable() }; return { editorRef, mode: 'default', valueHtml, toolbarConfig, editorConfig, handleCreated, handleChange, handleDestroyed, handleFocus, handleBlur, customAlert, customPaste, insertText, printHtml, disable }; }, }; [/code]步骤 4: 在模板中添加编辑器容器在Vue组件的模板中,添加一个容器元素来承载[code]wangeditor[/code]: [code] <div style="border: 1px solid #ccc; margin-top: 10px"> <Toolbar :editor="editorRef" :defaultConfig="toolbarConfig" :mode="mode" style="border-bottom: 1px solid #ccc" /> <Editor :defaultConfig="editorConfig" :mode="mode" v-model="valueHtml" style="height: 400px; overflow-y: hidden" @onCreated="handleCreated" @onChange="handleChange" @onDestroyed="handleDestroyed" @onFocus="handleFocus" @onBlur="handleBlur" @customAlert="customAlert" @customPaste="customPaste" /> </div> [/code]步骤 5: 设置 wangeditor(可选)[code]wangeditor[/code]提供了多种设置选项,您可以根据需要举行设置。比方,设置编辑器的自界说菜单、上传图片的接口等: [code]// const editorConfig = { placeholder: '请输入内容...' }; // 初始化 MENU_CONF 属性 const editorConfig = { // JS 语法 MENU_CONF: {}, placeholder: '请输入内容...' // 其他属性... } // 修改 uploadImage 菜单设置 editorConfig.MENU_CONF['uploadImage'] = { server: '/api/upload-image', fieldName: 'custom-field-name' // 继续写其他设置... //【留意】不需要修改的不用写,wangEditor 会去 merge 当前其他设置 } [/code]
步骤 6: 获取编辑器内容(可选)您可以通过[code]editor.txt.html()[/code]方法获取编辑器的HTML内容,或者通过[code]editor.txt.text()[/code]获取纯文本内容: [code] const printHtml = () => { const editor = editorRef.value; if (editor == null) return; console.log(editor.getHtml()); }; [/code]步骤 7: 清算资源当组件销毁时,确保释放编辑器资源,避免内存泄漏: [code] // 组件销毁时,也及时销毁编辑器,紧张! onBeforeUnmount(() => { const editor = editorRef.value; if (editor == null) return; editor.destroy(); }); [/code]全部代码[code]<template> <div> <div> <button @click="insertText">insert text</button> <button @click="printHtml">print html</button> <button @click="disable">disable</button> </div> <div style="border: 1px solid #ccc; margin-top: 10px"> <Toolbar :editor="editorRef" :defaultConfig="toolbarConfig" :mode="mode" style="border-bottom: 1px solid #ccc" /> <Editor :defaultConfig="editorConfig" :mode="mode" v-model="valueHtml" style="height: 400px; overflow-y: hidden" @onCreated="handleCreated" @onChange="handleChange" @onDestroyed="handleDestroyed" @onFocus="handleFocus" @onBlur="handleBlur" @customAlert="customAlert" @customPaste="customPaste" /> </div> <div style="margin-top: 10px"> <textarea v-model="valueHtml" readonly style="width: 100%; height: 200px; outline: none"></textarea> </div> </div> </template> <script> import '@wangeditor/editor/dist/css/style.css'; import { onBeforeUnmount, ref, shallowRef, onMounted } from 'vue'; import { Editor, Toolbar } from '@wangeditor/editor-for-vue'; export default { components: { Editor, Toolbar }, setup() { // 编辑器实例,必须用 shallowRef,紧张! const editorRef = shallowRef(); // 内容 HTML const valueHtml = ref('<p>hello</p>'); // 模仿 ajax 异步获取内容 onMounted(() => { setTimeout(() => { valueHtml.value = '<p>模仿 Ajax 异步设置内容</p>'; }, 1500); }); const toolbarConfig = {}; // const editorConfig = { placeholder: '请输入内容...' }; // 初始化 MENU_CONF 属性 const editorConfig = { // JS 语法 MENU_CONF: {}, placeholder: '请输入内容...' // 其他属性... } // 修改 uploadImage 菜单设置 editorConfig.MENU_CONF['uploadImage'] = { server: '/api/upload-image', fieldName: 'custom-field-name' // 继续写其他设置... //【留意】不需要修改的不用写,wangEditor 会去 merge 当前其他设置 } // 组件销毁时,也及时销毁编辑器,紧张! onBeforeUnmount(() => { const editor = editorRef.value; if (editor == null) return; editor.destroy(); }); // 编辑器回调函数 const handleCreated = (editor) => { console.log('created', editor); editorRef.value = editor; // 记载 editor 实例,紧张! }; const handleChange = (editor) => { console.log('change:', editor.getHtml()); }; const handleDestroyed = (editor) => { console.log('destroyed', editor); }; const handleFocus = (editor) => { console.log('focus', editor); }; const handleBlur = (editor) => { console.log('blur', editor); }; const customAlert = (info, type) => { alert(`【自界说提示】${type} - ${info}`); }; const customPaste = (editor, event, callback) => { console.log('ClipboardEvent 粘贴变乱对象', event); // 自界说插入内容 editor.insertText('xxx'); // 返回值(留意,vue 变乱的返回值,不能用 return) callback(false); // 返回 false ,阻止默认粘贴举动 // callback(true) // 返回 true ,继续默认的粘贴举动 }; const insertText = () => { const editor = editorRef.value; if (editor == null) return; editor.insertText('hello world'); }; const printHtml = () => { const editor = editorRef.value; if (editor == null) return; console.log(editor.getHtml()); }; const disable = () => { const editor = editorRef.value; if (editor == null) return; editor.disable() }; return { editorRef, mode: 'default', valueHtml, toolbarConfig, editorConfig, handleCreated, handleChange, handleDestroyed, handleFocus, handleBlur, customAlert, customPaste, insertText, printHtml, disable }; }, }; </script> [/code]通过以上步骤,您可以在Vue项目中轻松地集成和利用[code]wangeditor[/code]作为富文本编辑器。[code]wangeditor[/code]提供了丰富的功能和良好的定制性,可以满足大多数富文本编辑的需求。 到此这篇关于Vue利用wangeditor创建富文本编辑器的完备指南的文章就介绍到这了,更多相干Vue wangeditor富文本编辑器内容请搜索脚本之家从前的文章或继续浏览下面的相干文章盼望各人以后多多支持脚本之家! 来源:https://www.jb51.net/javascript/326712q3w.htm 免责声明:如果侵犯了您的权益,请联系站长,我们会及时删除侵权内容,谢谢合作! |
 /6
/6 
 |手机版|小黑屋|梦想之都-俊月星空
( 粤ICP备18056059号 )|网站地图
|手机版|小黑屋|梦想之都-俊月星空
( 粤ICP备18056059号 )|网站地图
GMT+8, 2025-7-2 03:48 , Processed in 0.030443 second(s), 18 queries .
Powered by Mxzdjyxk! X3.5
© 2001-2025 Discuz! Team.